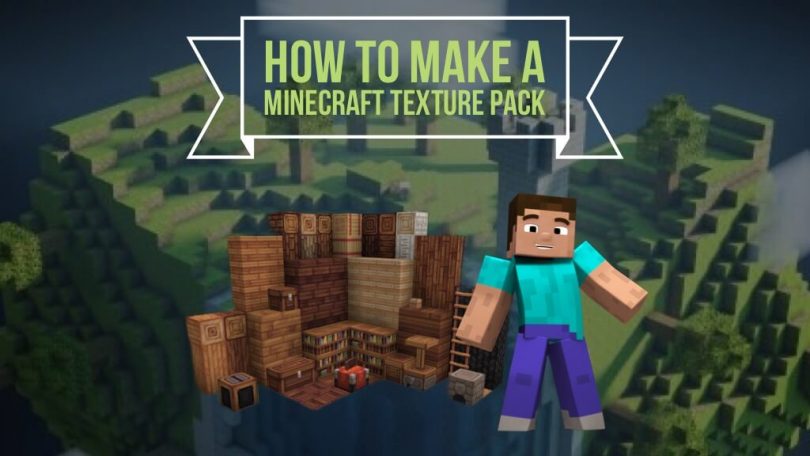
This Minecraft tutorial explains How To Make A Minecraft Texture Pack with detailed screenshots and step-by-step instructed process.
You might have seen some cool texture packs being used on YouTube videos; ever wanted to add them to your game? Even if you did know how to add texture packs created by others into your game, did you ever want to make your own? If you did, then you are in the correct place. We have compiled a detailed guide that walks you through step by step on how to create and add your texture pack into the game in the Minecraft java edition.
What are Texture packs?
Texture packs, also known as Resource packs, are files that are used to change the in-game texture of almost all entities, like blocks, items, mobs, and even the Graphical User Interface. Once the player has a texture pack, they can place it in the texturepacks folder in the .minecraft folder. Once placed inside the folder, the player can use them by adding them through the options menu from within the game.
Prerequisite software
A few software are crucial in creating your own texture pack. The first is an Archive software, which is needed to extract and archive files. We recommend using either WinRAR or 7-Zip; they are both free to download and install. Windows 11 has an inbuilt archive feature, so its users do not have to install any other additional archive software.
The next required software is image editing; for this, the user can use whatever image editing software they are most comfortable with, like GIMP, Photoshop, CorelDRAW, or any other editor they love. We recommend Paint 3D for beginners as it is very simple to use; those experienced with Adobe Photoshop can go with that instead.
Creating and using a Texture file
This guide teaches you to create and use texture packs in the game. The whole process can be divided into a few parts-
Acquiring the required files
This part teaches you to extract the files that are needed to create a texture.
1. You will first have to press the Windows + R keys simultaneously; this will open the Run command.
2. There type %appdata% and press the OK button or hit the enter key.

3. That should bring you to the AppData folder; it should contain three subfolders- Local, LocalLow, and Roaming.
4. Open up the Roaming folder.

5. Find and open the .minecraft folder
6. Now navigate to the versions folder

7. The player can choose the version they want to make the texture pack for; if they want it for the latest version, then they will have to open the folder with the latest version number. Take, for example; the player wants to make a texture pack for the version 1.15.1, then they will have to find the 1.15.1 folder and open it.

8. There should be two items inside it, 1.15.1.jar and 1.15.1.json. please right–click on the 1.15.1.jar file and copy it. (Make sure NOT to drag and drop or cut and paste it instead. Only COPY.)

9. Now, you can close that window.
10. You can paste the file you just copied into a folder or on the desktop, though I recommend creating a folder and pasting the .jar file into it.
11. If you are using windows 11 and don’t have any archive software like WinRAR or 7-Zip installed, follow the next step; if not, skip to Step 15.
12. Before the following step, you must make sure that the file you pasted reads 1.15.1.jar and not simply 1.15.1; if you do not see the extension (.jar), In the file explorer, click on the View tab and turn on the File name extensions
13. Now, with the file name extensions turned on, right–click on 1.15.1.jar and click rename. Rename it to 1.15.1.zip; if you had pasted a different game version, simply change the .jar to .zip; an alert will be shown saying that changing the file name extension can make the file unusable; click on Yes
14. You can simply right–click on the file you just renamed and click on extract all.
15. If you are using any other operating system, you must install WinRAR or 7-Zip. Once you have any of them installed, you can right–click on the .jar file and extract the files.

16. Once you have the files extracted, you can delete the .jar folder (or the renamed folder)
17. Now, open the file you just extracted and delete all the files except the assets folder. You can further delete unnecessary files by opening up the assets folder and deleting everything else besides the Minecraft folder.
18. You can copy your main folder, i.e., the extracted folder, to some other place in case you need it to create a texture pack again in the future (Which saves you a lot of steps)
Creating your own Texture Pack
Now we move to the actual process of creating your texture pack.
1. Open up the textures folder; it is inside the folder you just extracted.
2. Open the extracted folder, now open the assets folder, now the Minecraft folder; you should be able to find the textures folder. Double–click on it to open it. 1.15.1>assets>minecraft>textures

3. Now, select a category you want to make a texture for. We are going for the block

4. At this part, you will need to use image-editing software like adobe photoshop, paint, or Paint 3D. We recommend using paint 3D as it is quite beginner-friendly.
5. Once you have decided on what block to make a texture for, right–click on it and select open with and choose Paint 3D.

6. Now redesign it however you want it to look, with the tools at your disposal. Your imagination is your only limit.
7. Once you are done, hit Ctrl + S to save or click on the menu in the top left corner and click on the Save option.
8. After saving your design, you can exit the Paint 3D software; whatever block you edited should now have your updated design.
9. You can leave the other items in the folder or delete everything you did not edit (including texture folders you did not edit). The latter is important to do if you are planning on sharing your texture pack. Sharing texture packs with the default Minecraft textures is illegal as they are copyrighted.
10. Now go back to the version number folder, the folder where you see the assets folder.
11. Right-click in that folder (NOT on the assets folder) and click on New; now click on Text Document. Name that file as pack.txt
12. Now open that pack.txt file with Notepad or Notepad++, whichever you prefer.
13. paste the following piece of code there-

The description can be whatever you want to type in.
14. The player has to not that; this code works only for version 1.15.1 as it uses pack format 5; if you are using other versions, change the pack format in the code accordingly.
15. Once you finish editing the code, hit Ctrl + S or save it manually, then you can close the notepad.
16. Now, right-click on the pack.txt file and rename it to pack. mcmeta, your computer is gonna tell you are changing file name extensions might cause the file to become unstable. ignore it and click Yes
17. We are almost done now; select all the files in the 1.15.1 folder and right-click now select compress to Zip File; if you have WinRAR or 7-Zip, you should see an Add to archive option; click on it. Name it whatever you want.

18. Now, you should have a .zip or .rar file depending on the software you used; you can copy it wherever you want.
Using your own Texture Pack in the game
We have come to the last stage of the guide. Now we will show you how to use the texture pack you just created in the game.
1. Open up the Minecraft launcher and click Play.

2. Now, in the game menu, click on the Options.
3. Your resource pack won’t show here as it has not been added yet. To add it click on Open Pack Folder

4. This should open the Minecraft pack folder, keep it open and now navigate to the .zip or .rar texture pack you created earlier.
5. Copy your texture pack and switch to the pack folder that was kept open; paste your pack there.
6. Now, close the Resource pack folder. If you followed all the steps properly, your pack should now be shown in the game’s resource pack menu.
7. Now, just hover your cursor over your pack; you should see a silver arrow on the icon of the pack; click on it. Now that will put the pack in the Selected tab. Meaning it will work in-game now.

8. Now, just click on Done, and you are good to go. You can now check out the texture you created and added to the game.